Home Decorating Ideas Painting Walls
I think much more timber paneling had been set up in '60s and '70s than just about any other period of time. If retro isn't your decorating style, the good news is-you don't need to take away the paneling; it could be coated. So choose your paint color, then follow these tips and painting approaches for a brighter, more updated area.
Soap and water
220 grit sandpaper
Multi function primer sealer
Indoor exudate paint
3/8 inches roller cover
Paint roller, roller tray
Paint brush
1. First thing you need to do will be determine if you genuinely wish to decorate your paneling. Most likely, when it really is coated, which is it. Therefore believe it over before you begin. Really, do you wish to continue? After that read on.
2. Some paneling (generally the actually affordable types) is obviously an image of lumber grain which has been glued to your front of a plywood or composite type board. Old-fashioned wisdom will say this type of paneling can't be coated. Well we for example never hear old-fashioned wisdom. If you should be stressed how your paneling will look, pick an inconspicuous place and do a test plot. Unless you believe paint will last, then cannot get it done. But unless you are utilising the space as an inside football industry, the paint should adhere.
3. You ought to make sure the paneling is without any soil and oil. Wash it well with a mild detergent and liquid. Dishwashing detergent works great. After the walls have actually dried sand gently with 220 grit sandpaper. A pole sander will make the task easier. After sanding, wipe the dirt away with a damp cloth.
4. Prime the paneling with a stain blocking primer. Paint it on similar to an ordinary wall, hiding from the ceiling, trim and baseboards. Cut-in the edges with a brush, and roll from the primer making use of a 3/8-inch roller cover. Allow to dry entirely, about 24 hours. Today decorate the paneling with an inside latex paint. I like satin finish for toughness, and it will be washed effortlessly. Paint as you performed the primer, cutting within the edges with a brush, after which rolling regarding the paint.
Discover only a little artwork technique strategy: after you roll a little part, utilize a wide paint brush (4 inch) and discuss the part from ceiling to floor in lengthy strokes. I really do this for an even more old-world decorating design. Allow it dry thoroughly, then add the second coat.
5. The grooves will continue to be if you don't fill all of them in. Fill all of the grooves with spackling mixture or dried out wall surface ingredient. Allow substance dried out, and sand it smooth. You can easily decide to perhaps not sand the spackle, adding surface towards wall surface.
So now you are quite ready to give it a try. Make sure to do the preparation work, and you will be good.
(Matt Fox writes this column with Shari Hiller. Additionally they co-hosted home & outdoors tv series place by-room. Written by Scripps Howard News Provider.)
|
Decorating Remodeling March/April 1986 Creative Ideas for Kitchens Living Rooms Bedrooms Dining Rooms & Even the Attic, Stencil Walls, Spatter Paint Floors, Home Makeover Guide, English Country Style, Ceiling Beams Book (Family Circle's Magazine of Style & Design) |
|
|
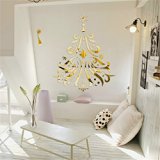
Yanqiao 55pcs DIY Christmas Tree Mirror Wall Stickers Snowflake and Star Wall Deocr Home Living Room Decoration 39.433.1",Gold Home
|